
Let’s build an iOS application with a Ruby on Rails backend that allows users to create and manage onboarding screens. Then lets inject the data for those screens as JSON into an iOS app and render the blocks as native SwiftUI Code. Then with a button, lets log conversions back to our rails backend app for the given screen. Lastly, we will display the winning onboarding screen based on the greatest number of conversions!
Let’s get started!
Install and set up docker
Inside the terminal on your computer run the following commands:
mkdir OnBorder
cd OnBorder
vim DockerfileThis will take you into the vim editor for your Dockerfile. Add the following code:
FROM ruby:3.2.2

# Node
ARG NODE_VERSION=18.15.0

RUN apt install -y curl
RUN curl -o- https://raw.githubusercontent.com/nvm-sh/nvm/v0.39.0/install.sh | bash
ENV NVM_DIR=/root/.nvm
RUN . "$NVM_DIR/nvm.sh" && nvm install ${NODE_VERSION}
RUN . "$NVM_DIR/nvm.sh" && nvm use v${NODE_VERSION}
RUN . "$NVM_DIR/nvm.sh" && nvm alias default v${NODE_VERSION}
ENV PATH="/root/.nvm/versions/node/v${NODE_VERSION}/bin/:${PATH}"
RUN node --version
RUN npm --version

# Install Yarn
RUN . "$NVM_DIR/nvm.sh" && npm install -g yarn
RUN yarn --version

# App
WORKDIR /usr/src/appThen run
vim docker-compose.ymlAdd the following text
services:
  web:
    build: .
    ports:
      - "3000:3000"
    volumes:
      - .:/usr/src/app
command: rails s -b 0.0.0.0In your terminal run
docker-compose run --service-ports web bashThis will load you into the containers terminal. Run
gem install rails
rails new . --css tailwind
exit
vim DockerfileAnd add the following code to the bottom of your Dockerfile
// Add to Dockerfile
COPY . .
RUN bundle installNow in your terminal run
docker-compose build
docker-compose upRails Scaffolding
Go to the newly created container in docker desktop. And open the terminal and run the following commands
rails g scaffold screen name:string content:text
rake db:migrate
rake tailwindcss:buildInstall EditorJs
Then run
./bin/importmap pin @editorjs/editorjsCreate javascript controller
Create a screens javascript controller at app/javascript/controllers/screens_controller.js
Import EditorJS
import EditorJS from '@editorjs/editorjs';
import { Controller } from "@hotwired/stimulus"

export default class extends Controller {
  connect() {
    this.buildEditor()
  }

  buildEditor() {
    let editor = new EditorJS({
      placeholder: "Make something Awesome Here"
    });
  }
}
Edit screens form
In view/screens/_form.html.erb
- Remove content field
- Add editorjs div:
<div id="editorjs"></div> - Add content hidden field:
<%= form.hidden_field :content, id: "content", value: screen.content.as_json %> - Modify the form wrapper:
<%= form_with(model: screen, html: { id: "screen-form", "data-controller": "screens" }) do |form| %>Adding validation and serialization
Inside models/screen.rb add validation code for our fields:
class Screen < ApplicationRecord
  validates :name, :content, presence: true
  serialize :content, JSON
endSaving content
In our screens_controller.js and add the highlighted code
import EditorJS from '@editorjs/editorjs';
import { Controller } from "@hotwired/stimulus"

export default class extends Controller {
  connect() {
    this.contentInput = document.querySelector('[name="screen[content]"]');
    this.buildEditor()
    this.registerEvents()
  }

  buildEditor() {
    this.editor = new EditorJS({
      placeholder: "Make something Awesome Here",
      data: JSON.stringify(this.contentInput.value)
    });
  }

  registerEvents() {
    const screenForm = document.querySelector("#screen-form");
    screenForm.addEventListener("submit", (e) => {
        e.preventDefault();

        this.editor.save()
            .then((outputData) => {
                this.contentInput.value = JSON.stringify(outputData)
                screenForm.submit();
            })
            .catch((error) => {
                alert("Something went wrong")
            });
    });
  }
}Add some plugins
In the docker terminal execute
./bin/importmap pin @editorjs/header @editorjs/simple-image @editorjs/list editorjs-buttonAnd import them into screens_controller.js
import Header from '@editorjs/header'
import List from '@editorjs/list'
import SimpleImage from '@editorjs/simple-image'
import Button from 'editorjs-button'Then add a tools property to our editor config. Change the buildEditor() method to
buildEditor() {
    this.editor = new EditorJS({
      placeholder: "Make something Awesome Here",
      data: JSON.stringify(this.contentInput.value),
      tools: {
        header: Header,
        list: List,
        image: SimpleImage,
        button: Button
      },
    });
}Tailwind css removes default styling for header tags so lets recreate them.
Inside /app/assets/stylesheets. Add a file called sheets.css with the following code
#editorjs h1 {
    font-size: 2.5em;
    font-weight: bold;
    margin: 0.67em 0;
}

#editorjs h2 {
    font-size: 2em;
    font-weight: bold;
    margin: 0.83em 0;
}

#editorjs h3 {
    font-size: 1.5em;
    font-weight: bold;
    margin: 1em 0;
}

#editorjs h4 {
    font-size: 1.17em;
    font-weight: bold;
    margin: 1.33em 0;
}

#editorjs h5 {
    font-size: 1em;
    font-weight: bold;
    margin: 1.67em 0;
}

#editorjs h6 {
    font-size: 0.83em;
    font-weight: bold;
    margin: 2.33em 0;
}Great now our header text in the editor will be styled correctly.
Editing a screen
We’ve finished creating a new screen but what if we want to edit a previously created screen? Lets do that now. All we will need to do is populate the editor with a screens content in the form and we should be good to go.
Inside screens_controller.js in the buildEditor() add the highlighted code:
  buildEditor() {
    this.editor = new EditorJS({
      placeholder: "Make something Awesome Here",
      data: JSON.stringify(this.contentInput.value),
      tools: {
        header: Header,
        list: List,
        image: SimpleImage,
        button: Button
      },
      data: this.contentInput.value !== '' ? JSON.parse(this.contentInput.value) : null
    });
}Setup for split testing
rails g migration add_split_testing_to_screens visits:integer conversions:integerThen open the newly created migration file and set the default values
class AddSplitTestingToScreens < ActiveRecord::Migration[7.0]
  def change
    add_column :screens, :visits, :integer, :null => false, :default => 0
    add_column :screens, :conversions, :integer, :null => false, :default => 0
  end
endRun db:migrate in the docker terminal
rake db:migrateWe will have to add these columns manually to our views
In app/views/screens/_screen.html.erb add the highlighted code:
  <p class="my-5">
    <strong class="block font-medium mb-1">Content:</strong>
    <%= screen.content %>
  </p>

  <p class="my-5">
    <strong class="block font-medium mb-1">Visits:</strong>
    <%= screen.visits %>
  </p>

  <p class="my-5">
    <strong class="block font-medium mb-1">Conversions:</strong>
    <%= screen.conversions %>
  </p>

  <% if action_name != "show" %>
    <%= link_to "Show this screen", screen, class: "rounded-lg py-3 px-5 bg-gray-100 inline-block font-medium" %>
    <%= link_to 'Edit this screen', edit_screen_path(screen), class: "rounded-lg py-3 ml-2 px-5 bg-gray-100 inline-block font-medium" %>
    <hr class="mt-6">
<% end %>Create the onboarding endpoint for our app
Inside config/routes.rb add the highlighted code below
Rails.application.routes.draw do
  resources :screens
  # Define your application routes per the DSL in https://guides.rubyonrails.org/routing.html

  # Defines the root path route ("/")
  root "screens#index"
  get '/onboarding_screen', to: 'screens#onboarding_screen'
end
Then inside app/controllers/screens_controller.rb add the following method
  def onboarding_screen
    screen = Screen.all.sample # randomly select a record from the db
    screen.visits = screen.visits + 1
    screen.save

    render json: {
      id: screen.id,
      name: screen.name,
      content: JSON.parse(screen.content)
    }
endThen visit http://localhost:3000/onboarding_screen. You should see the json for a random screen. Go back to http://localhost:3000. You should see the visits count of that screen incremented by one.
Add another screen and test this out.
We’re done with the backend for now. We’ll come back to it later for the conversions part.
Creating our iOS app
First things first, lets create an app icon for our app.
Either go to icon kitchen and create your own app icon order download the one I used in the tutorial
Creating the iOS app
Go to Xcode: New > Project > App
Enter OnBorder for the product name and SwiftUI for the interface. Click save.
First let’s add our app icon to the project. Open the Assets file and click on AppIcon. Drag the logo.png file that you created in the last step into the 1024×1024 placeholder in the xcode window
Then go to Editor > Add New Asset > Image Set. Call it Logo and also drag the logo.png file into the placeholders
Create some groups
Create and Onboarding groups with two sub groups: Screens and Models
Create a new group called Onboarding and inside that group create a new swiftui file in the project called OnboardingScreen.swift
Creating JSON Models
Inside the Onboarding group create a new group called Models and a new swift file inside that group called Models.swift
Add following code to Models.swift
struct Screen: Codable {
    let id: Int
    let name: String
    let content: ScreenContent
}

struct ScreenContent: Codable {
    let time: Int
    let blocks: [Block]
    let version: String
}

enum BlockType: String, Codable {
    case image, header, paragraph, list, button
}

struct Block: Codable, Identifiable {
    let id: String
    let type: BlockType
    let data: BlockData
}

enum BlockData: Codable {
    case image(ImageData)
    case header(HeaderData)
    case paragraph(ParagraphData)
    case list(ListData)
    case button(ButtonData)

    init(from decoder: Decoder) throws {
        let container = try decoder.singleValueContainer()

        if let image = try? container.decode(ImageData.self) {
            self = .image(image)
        } else if let header = try? container.decode(HeaderData.self) {
            self = .header(header)
        } else if let button = try? container.decode(ButtonData.self) {
            self = .button(button)
        } else if let paragraph = try? container.decode(ParagraphData.self) {
            self = .paragraph(paragraph)
        } else if let list = try? container.decode(ListData.self) {
            self = .list(list)
        } else {
            throw DecodingError.dataCorruptedError(in: container, debugDescription: "Invalid block data")
        }
    }
}

struct ImageData: Codable {
    let url: String
    let caption: String
    let withBorder: Bool
    let withBackground: Bool
    let stretched: Bool
}

struct HeaderData: Codable {
    let text: String
    let level: Int
}

struct ParagraphData: Codable {
    let text: String
}

struct ListData: Codable {
    let style: String
    let items: [String]
}

struct ButtonData: Codable {
    let link: String
    let text: String
}Inside the OnboardingScreen.swift file create a view model for our screen
import SwiftUI
import Combine

enum OnboardingScreenState {
    case loading
    case loaded(Screen)
    case error(Error)
}

class OnboardingViewModel: ObservableObject {
    @Published var state: OnboardingScreenState = .loading
    @Binding var isOnboarding: Bool

    init(
        isOnboarding: Binding<Bool>
    ) {
        self._isOnboarding = isOnboarding
    }

    func showAppMain() {
        self.isOnboarding = false
    }
}And add the view Model to our OnboardingScreen struct:
struct OnboardingScreen: View {
    @StateObject var viewModel: OnboardingViewModel

    var body: some View {
        Text("Hello, World!")
    }
}Then inside OnBorderApp.swift make the following changes:
@main
struct OnBorderApp: App {
    @State var isOnboarding: Bool = true

    var body: some Scene {
        WindowGroup {
            if isOnboarding {
                OnboardingScreen(viewModel: .init(
                    isOnboarding: $isOnboarding
                ))
            } else {
                ContentView()
            }
        }
    }
}This will show our onboarding screen on load. Lets make some changes to our OnboardingScreen now
struct OnboardingScreen: View {
    @StateObject var viewModel: OnboardingViewModel

    var body: some View {
        switch viewModel.state {
        case .loading:
            ProgressView()
        case .loaded(let screen):
            ScrollView {
                renderScreen(screen)
            }
        case .error:
            errorOnboardingView
        }
    }

    private func renderScreen(
        _ screen: Screen
    ) -> some View {
        Text("Render text here")
    }

    private var errorOnboardingView: some View {
        VStack {
            Image("Logo")
                .cornerRadius(20)
            Text("OnBorder App")
                .font(.largeTitle)
                .bold()
            Button(action: {}) {
                Text("Lets go →")
            }
            .buttonStyle(.borderedProminent)
        }
    }
}

struct OnboardingScreen_Previews: PreviewProvider {
    static var previews: some View {
        OnboardingScreen(viewModel: .init(
            screenRepository: FakeScreenRepository(),
            isOnboarding: .constant(true)
        ))
    }
}Getting the backend screen
Create a new group inside the Onboarding group called Repositories and create a new swift file within it called ScreenRepository
Add the following code inside screen repository
import Foundation
import Combine

protocol ScreenRepositoryProtocol {
    func getOnboardingScreen() -> AnyPublisher<Screen, Error>
    func logConversion(screenId: Int)
}

enum RequestMethod: String {
    case get = "GET"
    case post = "POST"
}

class ScreenRepository: ScreenRepositoryProtocol {
    private let endpointUrl = "http://localhost:3000"

    func logConversion(screenId: Int) {
        // TODO
    }

    func getOnboardingScreen() -> AnyPublisher<Screen, Error> {
        let url = buildUrl(path: "/onboarding_screen")
        return URLSession.shared.dataTaskPublisher(for: url)
            .map { $0.data }
            .decode(type: Screen.self, decoder: JSONDecoder())
            .eraseToAnyPublisher()
    }

    private func buildUrl(
        path: String
    ) -> URL {
        var urlComponents = URLComponents(string: endpointUrl)!
        urlComponents.path = path
        return urlComponents.url!
    }
}

class FakeScreenRepository: ScreenRepositoryProtocol {
    func getOnboardingScreen() -> AnyPublisher<Screen, Error> {
        return Just(.init(id: 1, name: "Test", content: ScreenContent(time: 0, blocks: [], version: "")))
            .setFailureType(to: Error.self)
            .eraseToAnyPublisher()
    }

    func logConversion(screenId: Int) {
        // no op
    }
}
Dependency injection
Now that we have a screens repository, let’s inject it into our OnboardingViewModel
Go to the OnBorderApp file and add the highlighted code
@main
struct OnBorderApp: App {
    @State var isOnboarding: Bool = true
    let screenRepository = ScreenRepository()

    var body: some Scene {
        WindowGroup {
            if isOnboarding {
                OnboardingScreen(viewModel: .init(
                    screenRepository: screenRepository,
                    isOnboarding: $isOnboarding
                ))
            } else {
                ContentView()
            }
        }
    }
}Then go to the OnboardingViewModel and add the repository as property of the class and inject it in the initializer
class OnboardingViewModel: ObservableObject {
    let screenRepository: ScreenRepositoryProtocol

    @Published var state: OnboardingScreenState = .loading
    @Binding var isOnboarding: Bool

    init(
        screenRepository: ScreenRepositoryProtocol,
        isOnboarding: Binding<Bool>
    ) {
        self.screenRepository = screenRepository
        self._isOnboarding = isOnboarding
...And add it to our onboarding screen previews
struct OnboardingScreen_Previews: PreviewProvider {
    static var previews: some View {
        OnboardingScreen(viewModel: .init(
            screenRepository: FakeScreenRepository(),
            isOnboarding: .constant(true)
        ))
    }
}Not lets add the code to our view model initializer to get our screen and set the state of the viewModel
    ...
    init(
        screenRepository: ScreenRepositoryProtocol,
        isOnboarding: Binding<Bool>
    ) {
        self.screenRepository = screenRepository
        self._isOnboarding = isOnboarding

        self.screenRepository.getOnboardingScreen()
            .receive(on: DispatchQueue.main)
            .sink(
                receiveCompletion: { [weak self] completion in
                    switch completion {
                    case .finished:
                        return
                    case .failure(let error):
                        print(error)
                        self?.state = .error(error)
                    }
                },
                receiveValue: { [weak self] screen in
                    self?.state = .loaded(screen)
                }
            )
            .store(in: &cancelBag)
    }
...And add the cancelBag to our ViewModel
...
@Binding var isOnboarding: Bool

private var cancelBag = Set<AnyCancellable>()

init(
    screenRepository: ScreenRepositoryProtocol,
    isOnboarding: Binding<Bool>
)
...Building out the renderScreen function
Back in our OnboardingScreen modify the renderScreen function to
private func renderScreen(
    _ screen: Screen
) -> some View {
    VStack(spacing: 30) {
        ForEach(screen.content.blocks) { block in
            switch block.data {
            case .button(let data):
                Button(action: {}) {
                    Text(data.text)
                }
                .buttonStyle(.borderedProminent)
            case .image(let data):
                AsyncImage(url: URL(string: data.url)) { image in
                        image
                            .resizable()
                            .scaledToFill()
                    } placeholder: {
                        ProgressView()
                    }
            case .header(let data):
                Text(data.text)
                    .font(.largeTitle)
                    .bold()
            case .paragraph(let data):
                Text(data.text)
                    .font(.body)
            case .list(let data):
                VStack(alignment: .leading) {
                    ForEach(data.items, id: \.self) { item in
                        HStack {
                            Image(systemName: "checkmark.seal.fill")
                                .resizable()
                                .frame(width: 60, height: 60)
                                .foregroundColor(.blue)
                            Text(item)
                                .font(.headline)
                                .bold()
                                .foregroundColor(.blue)
                        }
                    }
                }
            }
        }
    }
}Wrapping up our view model
Inside the OnboardingViewModel lets add two new methods
func showAppMain() {
    self.isOnboarding = false
}

func buttonAction(screenId: Int, action: String) {
    if let action = ButtonAction(rawValue: action) {
        switch action {
        case .onboardingComplete:
            self.screenRepository.logConversion(screenId: screenId)
            self.isOnboarding = false
        }
    }
}Lets add the ButtonAction enum to our Models file
enum ButtonAction: String {
    case onboardingComplete
}And lets hook up our OnboardingScreen to trigger those new actions we implemented in our view model
private func renderScreen(
        _ screen: Screen
    ) -> some View {
        VStack(spacing: 30) {
            ForEach(screen.content.blocks) { block in
                switch block.data {
                case .button(let data):
                    Button(action: {
                        viewModel.buttonAction(screenId: screen.id, action: data.link)
                    }) {
                        Text(data.text)
                    }
                    .buttonStyle(.borderedProminent)
                case .image(let data):
                    AsyncImage(url: URL(string: data.url)) { image in
                            image
                                .resizable()
                                .scaledToFill()
                        } placeholder: {
                            ProgressView()
                        }
                case .header(let data):
                    Text(data.text)
                        .font(.largeTitle)
                        .bold()
                case .paragraph(let data):
                    Text(data.text)
                        .font(.body)
                case .list(let data):
                    VStack(alignment: .leading) {
                        ForEach(data.items, id: \.self) { item in
                            HStack {
                                Image(systemName: "checkmark.seal.fill")
                                    .resizable()
                                    .frame(width: 60, height: 60)
                                    .foregroundColor(.blue)
                                Text(item)
                                    .font(.headline)
                                    .bold()
                                    .foregroundColor(.blue)
                            }
                        }
                    }
                }
            }
        }
    }

    private var errorOnboardingView: some View {
        VStack {
            Image("Logo")
                .cornerRadius(20)
            Text("OnBorder App")
                .font(.largeTitle)
                .bold()
            Button(action: viewModel.showAppMain) {
                Text("Lets go →")
            }
            .buttonStyle(.borderedProminent)
        }
}Logging the conversion on button tap
Inside the ScreenRepository lets implement our logConversion function
func logConversion(screenId: Int) {
    let request = buildRequest(
        path: "/screens/\(screenId)/log_conversion",
        method: .post
    )
    URLSession.shared.dataTask(with: request).resume()
}And a new buildRequest private method to the ScreenRepository
private func buildRequest(
    path: String,
    method: RequestMethod
) -> URLRequest {
    let url = buildUrl(path: path)

    var request = URLRequest(url: url)
    request.httpMethod = method.rawValue

    return request
}Logging Conversions on the backend
Add the following link to your routes.rb file
post '/screens/:id/log_conversion', to: 'screens#log_conversion'and then the following method to your screens_controller.rb file
  def log_conversion
    screen = Screen.find(params[:id])
    screen.conversions = screen.conversions + 1
    screen.save
endAnd the following line to the top of ScreensController
class ScreensController < ApplicationController
  protect_from_forgery with: :null_session
...Now if you tap the “Lets Go →” button after launching the app you should see a conversion being logged for which ever screen was served!
One last piece
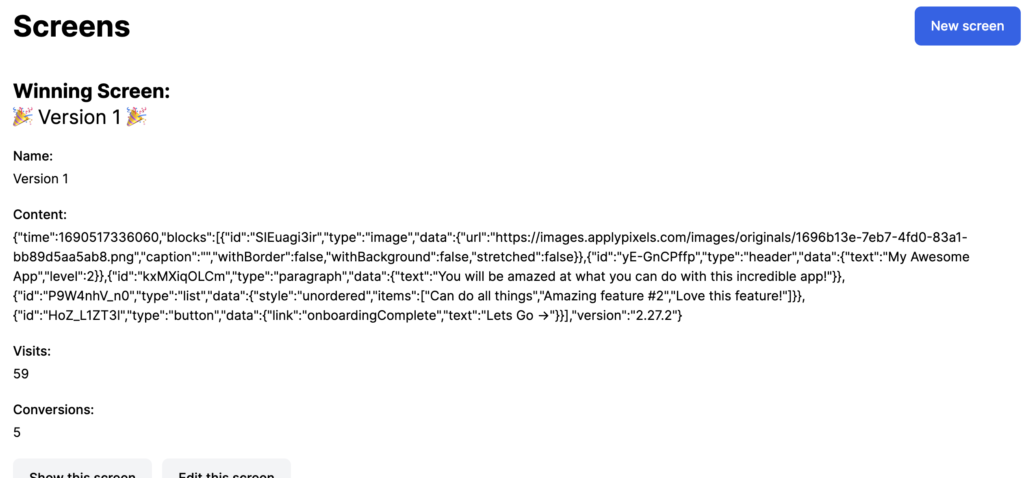
So we are logging the conversions for each screen. Lets add something to the top of our screens view to show which screen is leading the charge!
Replace the index method in ScreensController with the following
  # GET /screens or /screens.json
  def index
    @screens = Screen.all
    @winning_screen = Screen.order(conversions: :desc).first
endThen add the following code to views/screens/index.html.erb
  <div class="flex justify-between items-center">
    <h1 class="font-bold text-4xl">Screens</h1>
    <%= link_to 'New screen', new_screen_path, class: "rounded-lg py-3 px-5 bg-blue-600 text-white block font-medium" %>
  </div>


  <div class="w-full mt-10">
    <h1 class="font-bold text-2xl">Winning Screen:</h1>
    <% if @winning_screen %>
      <p class="text-2xl text-decoration-line">🎉 <%= link_to @winning_screen.name, @winning_screen %> 🎉</p>
    <% else %>
      <p class="text-2xl">No winning screen yet</p>
    <% end %>
  </div>

  <div id="screens" class="min-w-full">
    <%= render @screens %>
</div>In the docker terminal run rake tailwindcss:build then visit http://localhost:3000 and you should see
One Comment